Read Trial Balance Data reads the data from the file containing the trial balance produced by accounting software.
The data read from the file by ExcelFSM is the account number, the account Title and the account balance (Debit or Credit).
ExcelFSM retrieves the data directly from QuickBooks, without any need to export or reformat the data.
Setting up QuickBooks to work with ExcelFSM
QuickBooks Desktop
NOTE: The Intuit QuickBooks software must be installed on the PC running ExcelFSM.
First time you will Read Trial Balance Data in ExcelFSM, you'll be asked to allow ExcelFSM to read and modify QuickBooks company file
(Note that ExcelFSM does not modify the QuickBooks company file. It only reads data)
Select oYes, always; allow access even if QuickBooks is not running

Click Continue

Click Done
QuickBooks Online
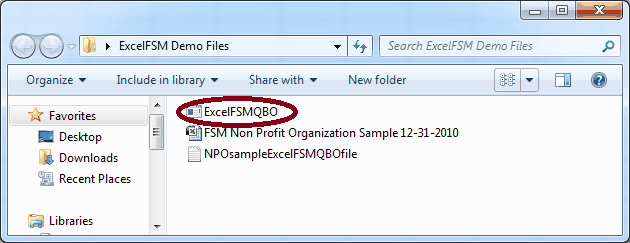
An "ExcelFSMQBO" company file must be created to allow ExcelFSM to read a QuickBooks Online company file. To create an "ExcelFSMQBO" company file, you will use the ExcelFSMQBO.exe utility program installed on your Windows Desktop in a folder called ExcelFSM Demo Files.
See how in the section 'Creating an ExcelFSMQBO company file with the ExcelFSMQBO.exe utility program' at the bottom of this topic.
Reading the accounting data
Once Excel is running, starting with a blank workbook, select the FSM tab in the ribbon:

QuickBooks Desktop
If QuickBooks is not running with a company file open, clicking the Read Trial Balance Data button opens the standard Windows dialog:

Figure 1: Trial Balance File selector
Type the file extension in the Search field (top right).
Select the file containing the desired trial balance data, and click Open.
QuickBooks Online
Clicking the Read Trial Balance Data button opens the standard Windows dialog (QuickBooks Desktop must not be running with a company file open):
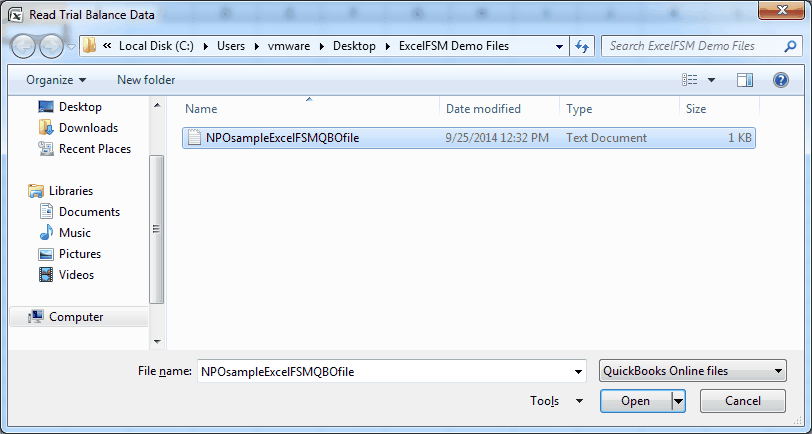
Figure 1: Trial Balance File selector
Select the 'QuickBooks Online files' filetype (bottom right)
Select the file containing the desired ExcelFSMQBO company file, and click Open.
Note: a demo file is installed on your Windows Desktop (in a folder called 'ExcelFSM Demo Files').
ExcelFSM shows the following dialog to allow you to specify additional information about this trial balance:

Figure 2: Trial Balance Information for QuickBooks file
Name of enterprise - The name of the enterprise identifies the Excel workbook (along with the as of date), fills the selected worksheet cell when the Enterprise Name button is clicked.
As-of-Date for this Trial Balance - The date of the trial balance will be used, along with the enterprise name, to identify the Excel workbook, to initialize a cell with the As-of Date button, to compute balance variation between two financial periods, as well as to select the Comparative periods balances.
NOTE: The above dialog (Figure 2) will be empty if it is a blank workbook. Make sure you put the right as-of date.
For subsequent financial periods, you will be updating an existing FSM workbook by reading the trial balance data with another as-of date. The above dialog will be pre-filled according to the previous financial period. It will be important that you update the as-of date to reflect the new period; otherwise, ExcelFSM will assume you are re-reading an amended trial balance for an existing period and, if you confirm to proceed, will update the existing period's data instead of processing a new period (Yes, ExcelFSM has the capacity to process amended trial balances and automatically update the financial reports). ExcelFSM has also the capacity to add prior periods to an existing FSM workbook.
With Classes - Check if you want the "classes" to be part of the trial balance (QuickBooks Desktop only).
The classes will appear in the Chart of Accounts and identified by " | <Class name>:<Subclass name>" inserted at the end of the account's title.

If one or more classes of an account has a non-zero balance, then all classes of that account will appear.
If one or more subclasses of a class has a non-zero balance, then all subclasses of that class will appear.
If all classes (or subclasses) of an account have zero balances, they will not appear.
Copy adjusting entries - Check if you want to copy the current adjusting entries for the new financial period. You will be able to edit or delete these according to the new financial period. This feature is useful, for example, if the adjusting entries must be repeated one financial period after the other.
Results
Click OK. The following actions occur:
•The trial balance data is imported and organized
•A new FSM workbook is created. It's name is
<Enterprise> <As-of date>.

•A new worksheet named 'ReadTBData printout' is inserted into this workbook.
(The account's number and title are displayed in cell E1 during the process.)
•The Chart of Accounts is opened.
Updating the Chart of Accounts
If this is the first time the workbook has had a trial balance read into it, a Chart of Accounts is built.
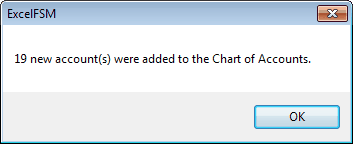
If the workbook contained previous trial balances, the Chart of Accounts, which was previously built, is updated. The number of new accounts that were added to the Chart of Accounts is displayed:
The new accounts are shown at the top of the Chart:

You may reorder these new accounts by dragging and dropping with the mouse or by clicking the 'Reorder new accounts' button, whenever you wish. A good time to do so is after you’ve grouped them into the proper financial reports Items.
Note: Account titles changed in the accounting software will likewise be changed in ExcelFSM.
ReadTBData printout
The ‘ReadTBData printout’ shows the data read by ExcelFSM:
•Name of enterprise
•As-of-Date
•With Classes (checked or not)
•Copy adjusting entries (checked or not)
•Data of the trial balance
•Number of accounts
•Computed totals for Debit and Credit
Note: The only purpose for this worksheet is to help you verify that the Trial Balance was read correctly. You may print it, delete it, etc.
Updated Reports
Any existing reports in your workbook are automatically updated with the new trial balance data:
•Item balances are updated to reflect the new account balances.
•Totals are then updated according to the new Item balances.
•As-of dates are updated.
•If Transfer adjusting entries was checked, the adjusting entries of the previous financial period are copied into the new financial period.
New Workbook created for each subsequent financial period

When the trial balance data for a new financial period (i.e. the As-of date has changed) is read and this new financial period is subsequent to the last financial period read, i.e. not a prior period added to an existing FSM workbook, the existing workbook is copied, and the new period's data is read into the new copy of the workbook.
Your original workbook will not be altered, and thus will contain only the data from the previous financial period. As more financial periods are read, you will retain a historical series of workbooks, one for each of their respective financial periods.
Note: Since the name of the workbook contains the Enterprise name and As-of date, the workbooks are easy to identify.
Note: Account balances of previous financial periods are preserved in the new workbook containing the latest financial period and are used for the Comparative presentation. However, you might need to access a historical workbook to see things like the Chart of Accounts as of a previous period, and the Adjusting Entries used in a previous period.
Creating an ExcelFSMQBO company file with the ExcelFSMQBO.exe utility program
An "ExcelFSM QBO" company file containing the keys must be created, to allow ExcelFSM to read the trial balance data from a QuickBooks Online company file.
To create this file, you will use the ExcelFSMQBO.exe utility program installed on your Windows Desktop in a folder called ExcelFSM Demo Files
Double click the ExcelFSMQBO.exe.
The following dialog is displayed

Follow the instructions below to get the data required to fill the fields and create the ExcelFSMQBO company file.
Company ID:
In your QuickBooks Online Company, click ‘Your Account’
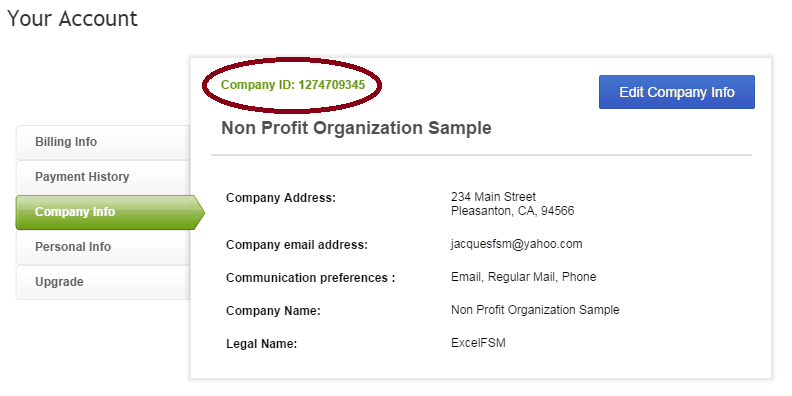
Copy&Paste the Company ID in the ExcelFSMQBO Company ID field
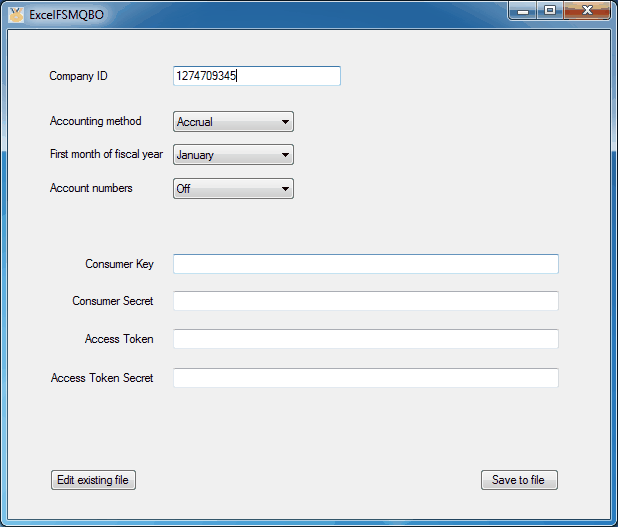
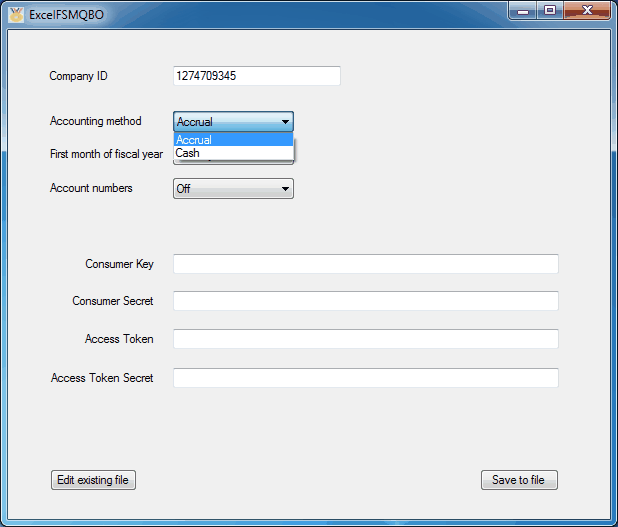
Accounting method (Accrual or Cash):
Click ‘Company Settings’, in your QuickBooks Online Company
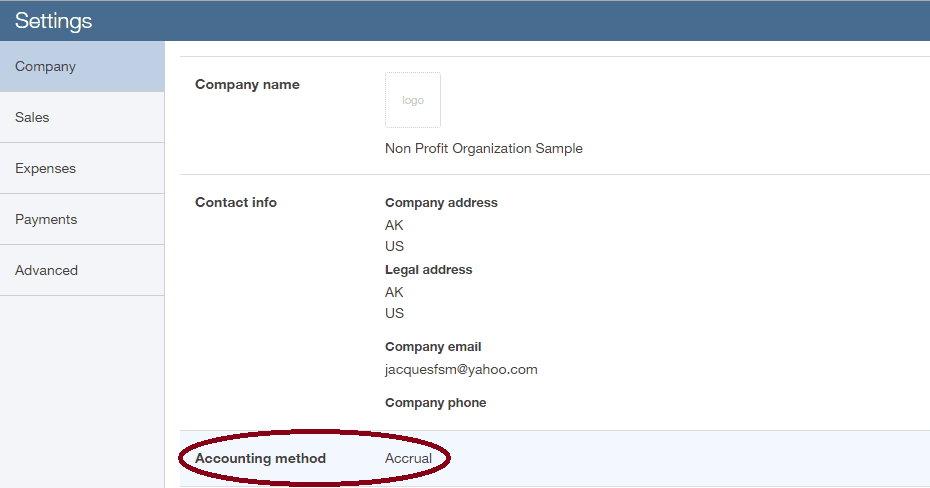
Set the ExcelFSMQBO company file Accounting method according to the Company Settings
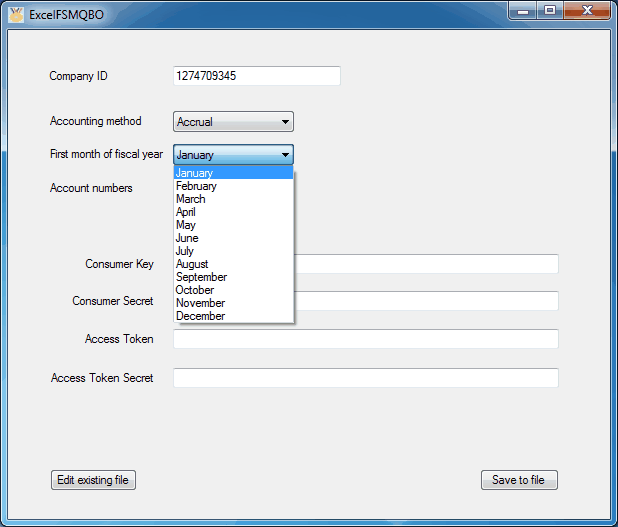
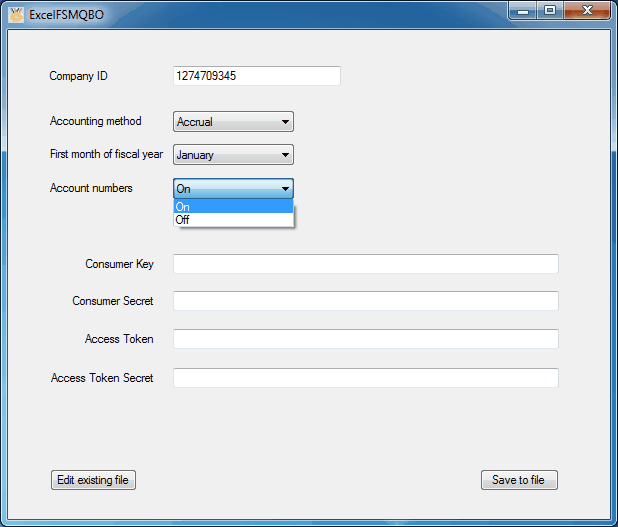
First month of fiscal year and Account numbers (On or Off):
Click ‘Advanced’ in the Company Settings
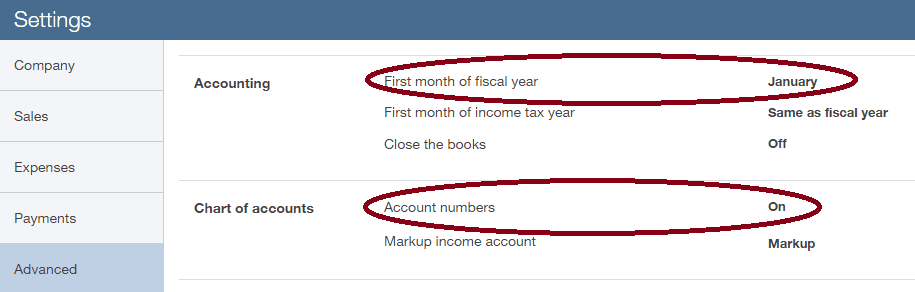
Set the ExcelFSMQBO First month of fiscal year according to the Company Settings
Set the ExcelFSMQBO Account numbers according to the Company Settings
Consumer Key, Consumer Secret, Access Token, Access Token Secret:
Having an account on QuickBooks Online, you have access to the Intuit App Center Playground, which allows to generate the required keys/tokens to be specified in the remaining fields.
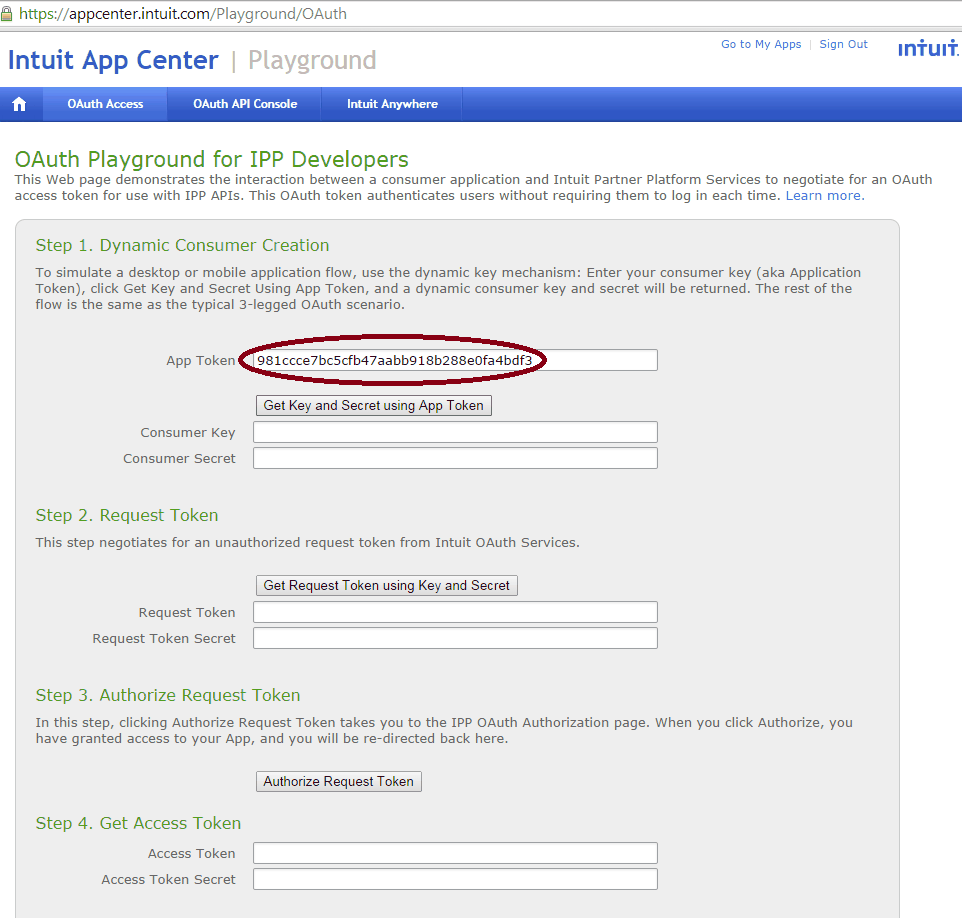
- Click this link https://appcenter.intuit.com/Playground/OAuth
- Copy&Paste the following code >981ccce7bc5cfb47aabb918b288e0fa4bdf3< in the App Token field of the OAuth Playground
Click ‘Get Key and Secret using App Token’
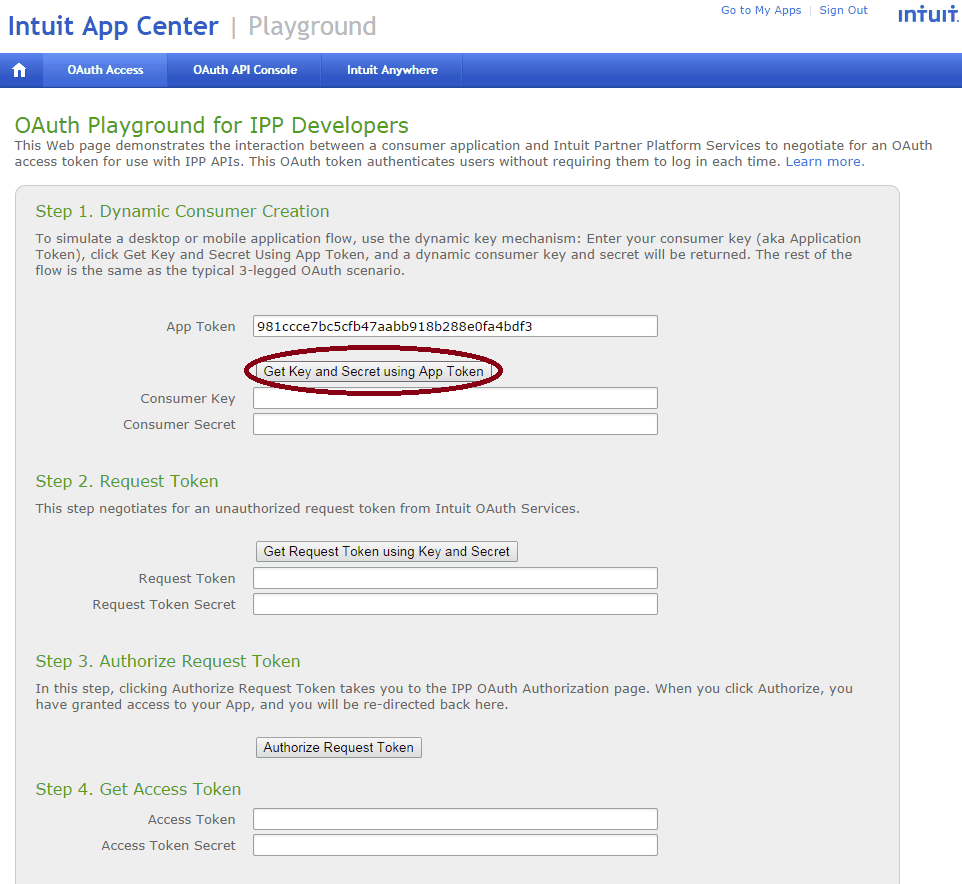
The Consumer Key and Consumer Secret are generated
Click ‘Get Request Token using Key and Secret’
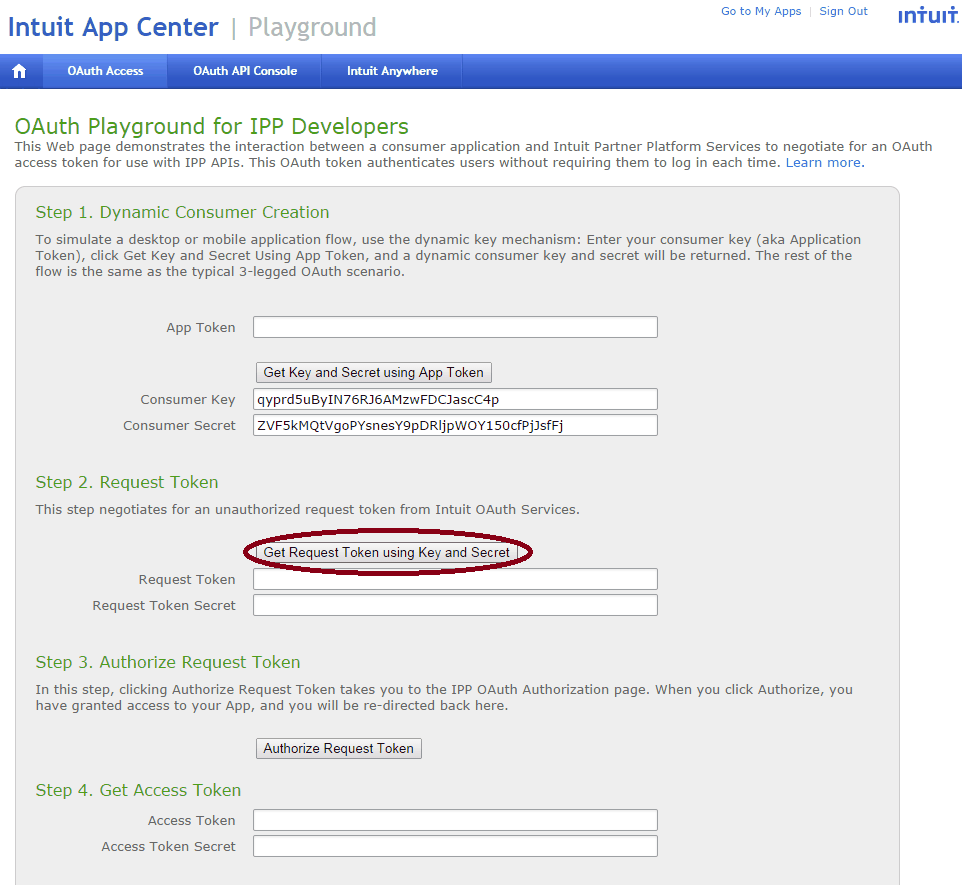
The Request Token and Request Token Secret are generated
Click ‘Authorize Request Token’
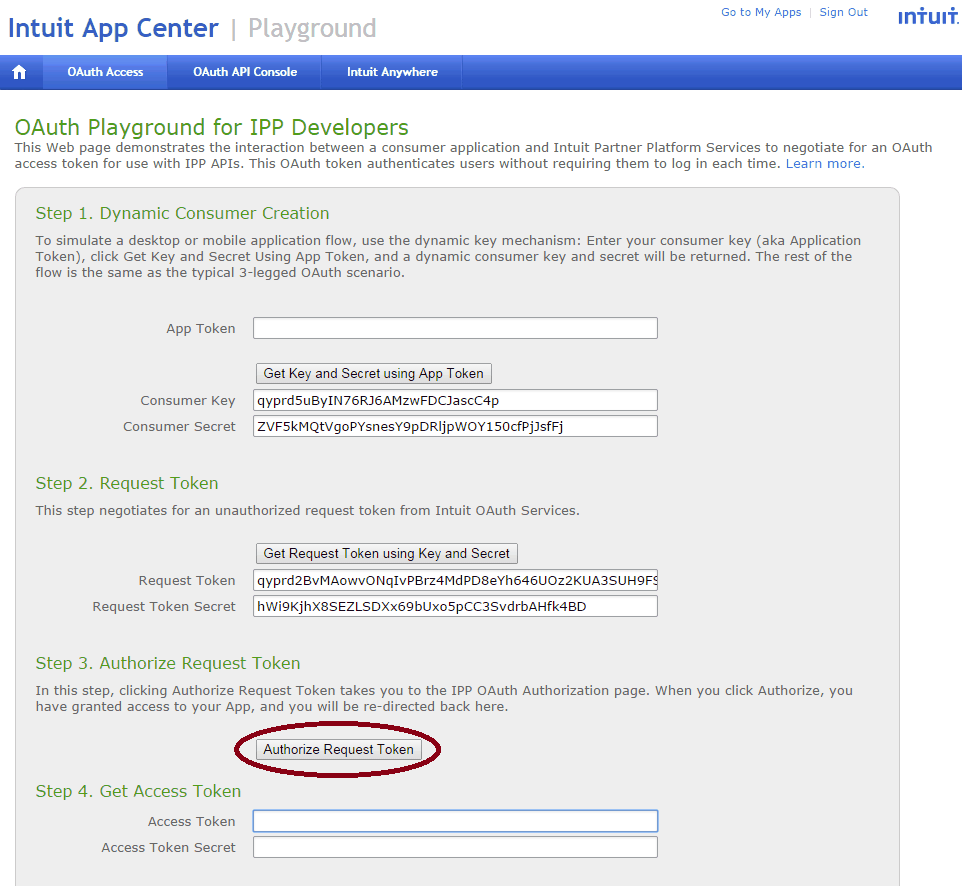
The following dialog appears
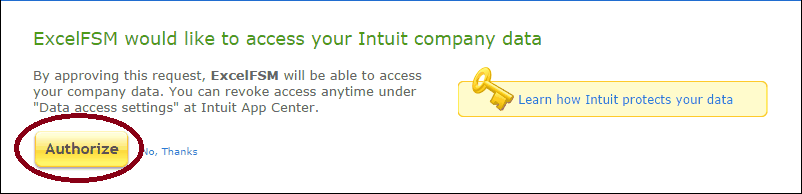
Click ‘Authorize’
The following dialog appears
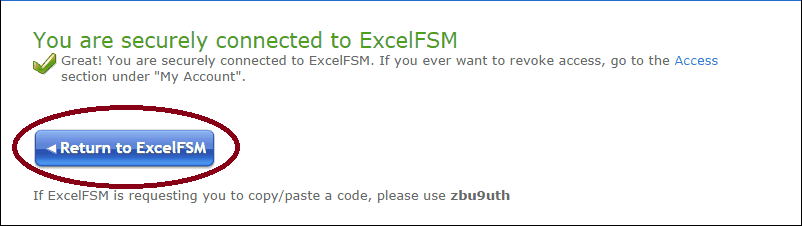
Click ‘Return to ExcelFSM’
The Access Token and Access Token Secret are generated
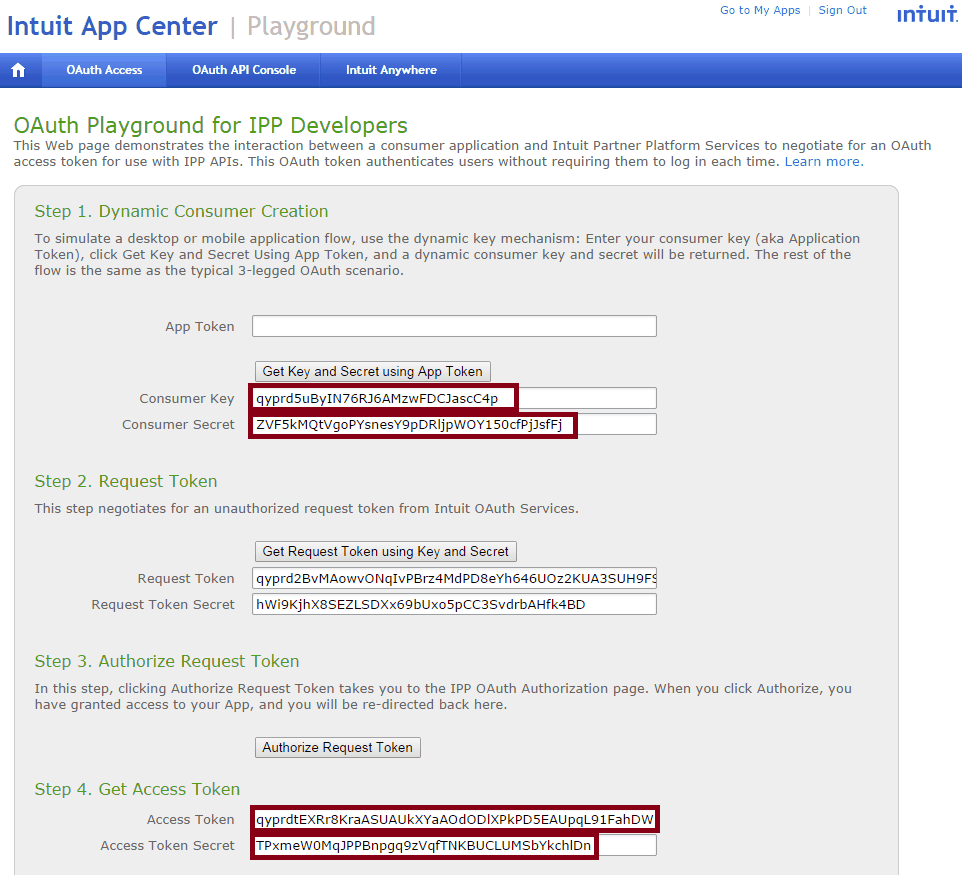
Copy&Paste the contents of the four fields in the corresponding ExcelFSMQBO four fields
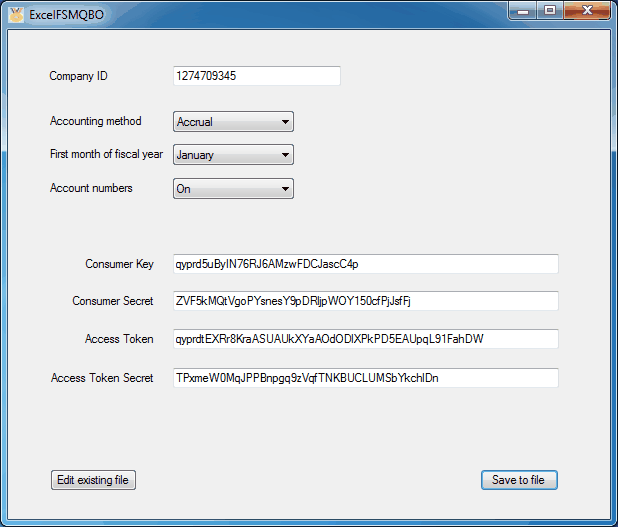
Click ‘Save to file’
Select a folder and specify a name for the ExcelFSMQBO file('<enterprise name>ExcelFSMQBOfile', for example).
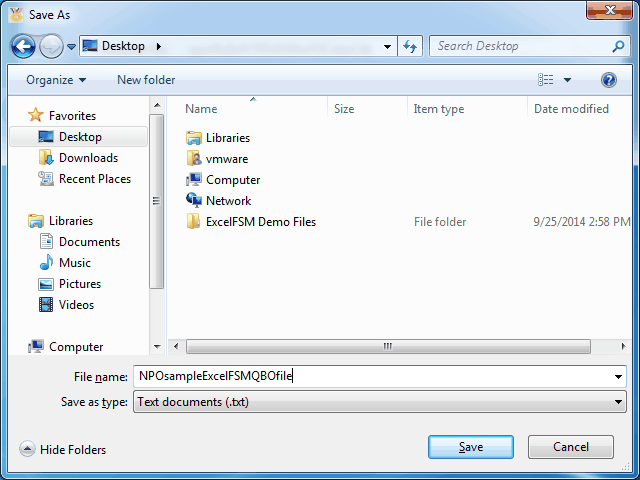
Click ‘Save’
ExcelFSM will now be able to read the trial balance data from your QuickBooks Online company file, by simply clicking the ‘Read Trial Balance Data’ button in the FSM ribbon, and selecting the ExcelFSM QBO file you created.