Group accounts into an Item and insert the item's balance into your financial report. (Also used to transform item's accounts into items, as shown at the bottom of the topic Details).
Clicking the Item Balance ribbon button, double clicking (or right-clicking) on a cell that already contains an Item balance shows:
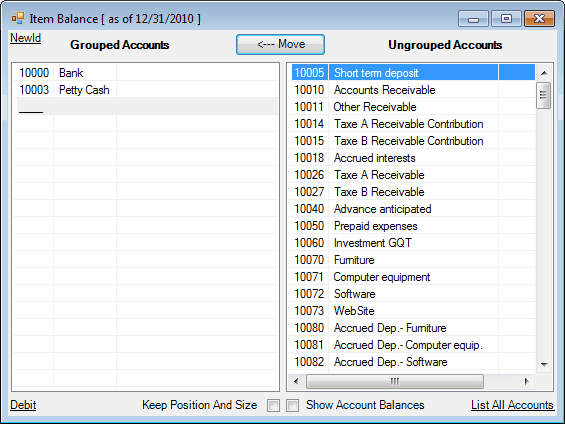
Accounts that are grouped into the Item are in the left list.
Accounts that are not grouped into this Item (or any other in the worksheet) are in the right list.
Note: This means that on a given worksheet, an account can be grouped into only one item.
Affecting how the Item Balance is computed
The Item Balance is computed as of the date shown in the title of the dialog at the top (e.g. "[ as of 12/31/2009 ]").
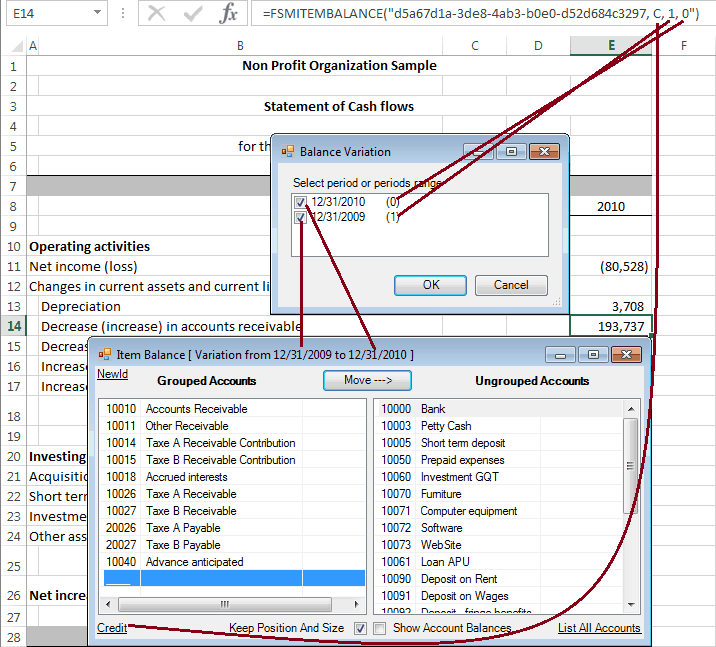
If Balance Variation button is ON, it might indicate e.g. “[ Variation from <beginning period date> to <ending period date> ]” and the balance is computed for that range of periods.
Item Sense
At the bottom left, the sense of the Item is indicated (e.g. "Debit"). By default, it is the sense of the first grouped account. Click it to change the sense of the Item. For example, in the above image, clicking "Debit" changes the sense of the Item to Credit. Clicking again changes it back to Debit.
The sense of an Item allows ExcelFSM to know whether or not the computed balance must be shown between parentheses. If the computed balance of an Item has a different sense than the sense of the Item, the balance is shown between parentheses.
Hint: When you want to change the default presentation of an Item, simply change the sense of the Item, in this dialog.
Note: This does not change the computation of a balance. This is only for presentation purposes.
Dialog position and size
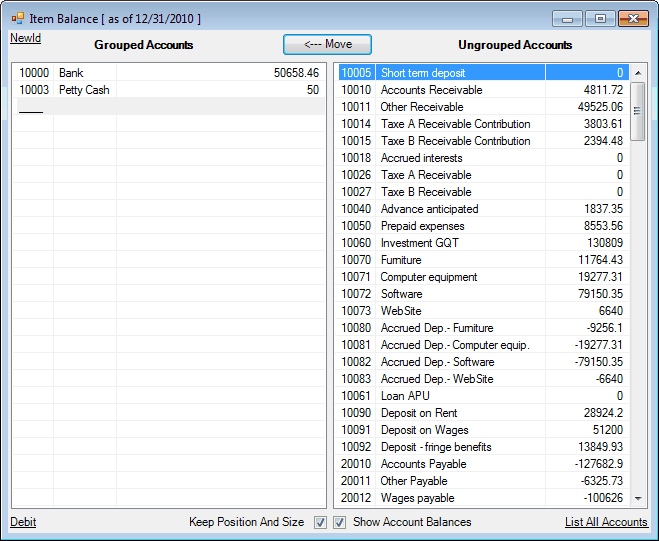
The dialog is movable and resizable. The bigger you make the window, the more accounts are visible. By default, the dialog is displayed besides the active cell. Once moved and resized, the new settings can become the default settings by checking the Keep Position And Size checkbox.
Account balances
The account balances can be shown by checking the Show Account Balances checkbox.
List All Accounts
As mentioned previously, accounts grouped into the Item are in the left list, and accounts not grouped into this Item (or any other in the worksheet) are in the right list, so on a given worksheet, an account can be grouped into only one item. However, there are some situations, such as in financial statement Notes for example, which might require an account to be grouped into more than one item on a given worksheet.
Clicking 'List All Accounts' at the bottom right will temporarily list all the accounts (except the accounts that are grouped into the Item) in the Ungrouped Accounts right list, allowing you to group an account into more than one item.
Shortcut: In addition to the FSM ribbon button, access this dialog by right-clicking on a worksheet cell to open its context menu, or by double-clicking on a cell that already contains an Item Balance.
Grouping / Ungrouping
To move accounts from one list to the other, double-click on a single account, or select one or more accounts, and then click the Move button. They will be moved to the other list, in the direction of the arrow shown in the Move button.
Selection
•Clicking a single account selects it.
•Hold down the Ctrl key while clicking accounts (or pressing the Space bar), to select multiple accounts
•Hold down the Shift key while clicking accounts (or pressing the display keys), to select all the accounts in between.
Move Selected Account(s)
•Click the Move button (or press the Enter key) to move the selected account(s).
•When moving account(s) to the Grouped Accounts list, the accounts will be moved above the selected account in the Grouped Accounts list.
•When moving account(s) to the Ungrouped Accounts list, the accounts will be placed in the order they are shown in the Chart of Accounts.
•When accounts are moved, the Item's balance is re-computed, and displayed immediately in the cell.
Order of accounts in the lists
•The Grouped Accounts list is maintained according to how the accounts were grouped (and is subject to the user's preference). In order to change the order of the Grouped Accounts, individual accounts must be ungrouped, then re-grouped in the correct position.
•The Ungrouped Accounts list is maintained in the same order as they appear in the Chart of Accounts
Saving an Item
When satisfied with the Grouped Accounts, click the 'X' in the upper right corner. Your changes will be preserved, and the dialog will close.
Effects of Grouping Changes
If your worksheets contain comparative columns, the Item's grouping within the comparative periods will also be changed.
Item grouping can be changed in any period.
Copying Item Balances
Item Balances are quickly recognizable because they have a cell formula starting with =FSMITEMBALANCE, e.g.:
=FSMITEMBALANCE("42968107-3573-487d-b3b1-aca16f6e9443, D, 0, 0")
You must be very careful when copying cells or worksheets containing Item Balances. If you copy cells or sheets that contains FSMITEMBALANCE formulas, you will end up with Items with formulas having the same grouping in more than one cell. Consequently, if you change the grouping or the sense of such an Item in one cell, it will be modified in the other cells as well. To change the grouping of such an Item in one cell without modifying the other cells, use the NewId button.
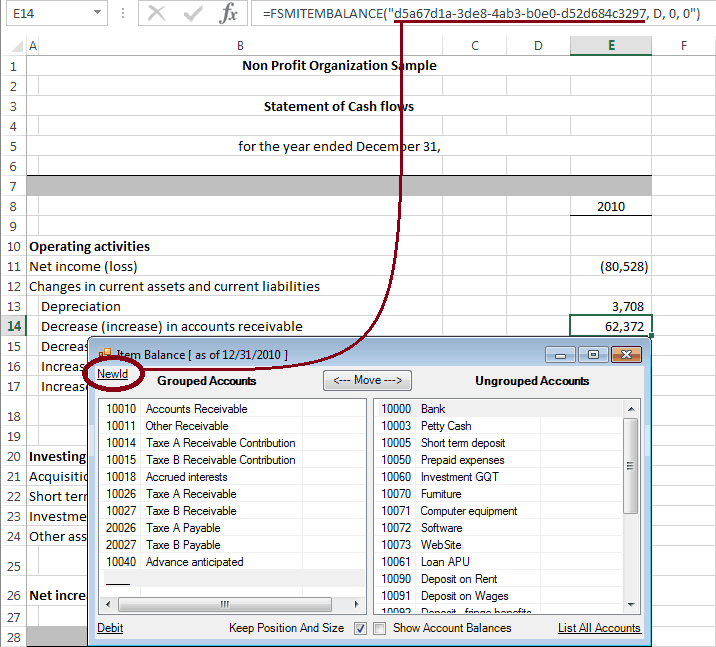
NewId: this button replaces the item's unique identifier (the first parameter '42....3' in the formula) with a new one.
Copying Item Balances and using the NewId button can be really useful for the building of the financial statement Notes and for the Statement of Cash Flows, as shown in the following sample:
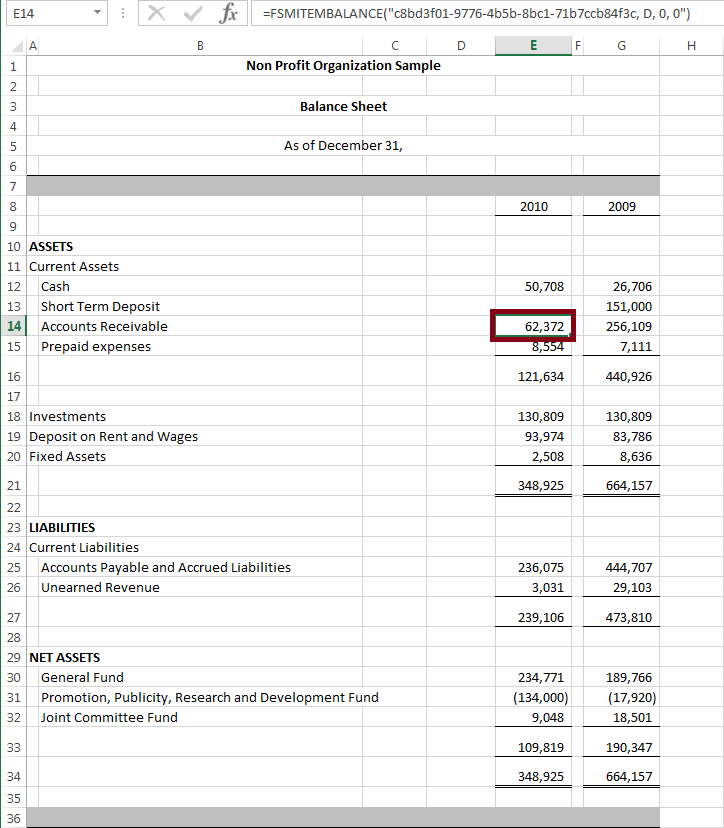
Copying an Item Balance cell from the Balance Sheet to the Statement of Cash Flows
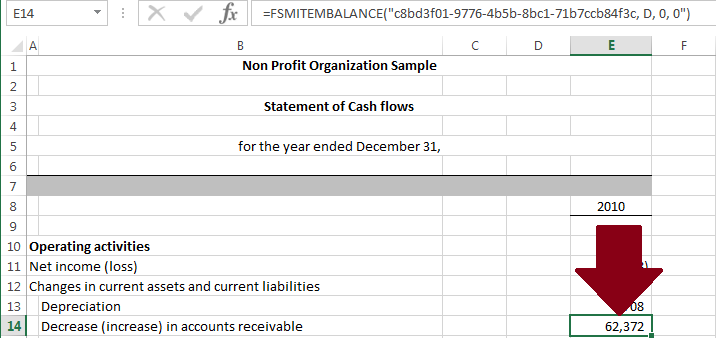
Clicking the NewId button: the item's unique identifier is replaced with a new one in the formula
Here is the formula, and its resulting value, after changing the sense of the Item to Credit and after selecting the periods range
Hint for cell format
The cell format for balances can be customized by adding ;; at its end, to show zero balance as blank.
