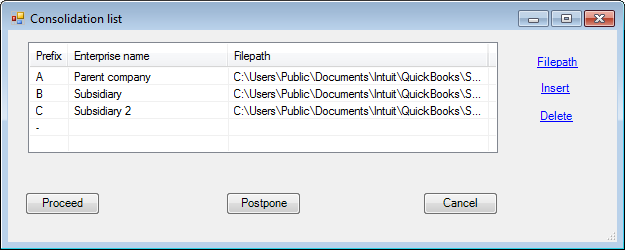
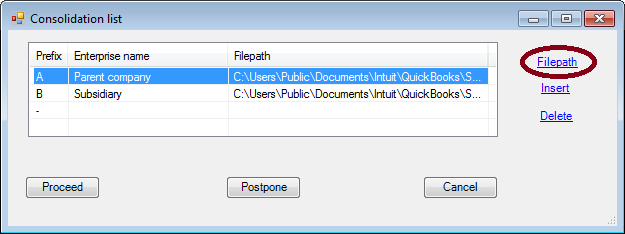
Clicking OK with For consolidated selected, ExcelFSM shows the following dialog to allow you to specify the name of each enterprise to be included in the consolidated financial statements, and to select the file containing the desired trial balance data for each enterprise:
Consolidation list dialog.
The Consolidation list dialog is movable and resizable.
Insert - Insert a new enterprise above the currently selected enterprise.
1.A blank row is inserted into the list.
2.The first column being managed by ExcelFSM, type the enterprise name into the second column.
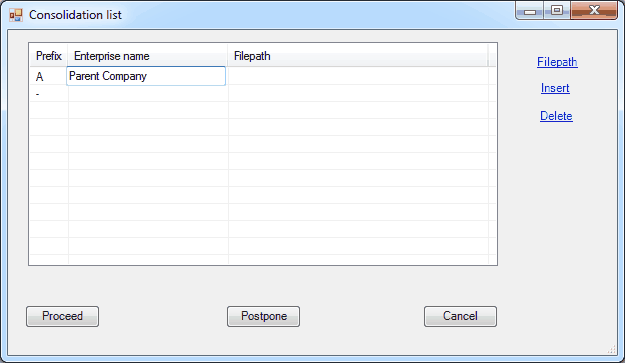
3.Double-click the third column or click 'Filepath' to open the standard Windows dialog.
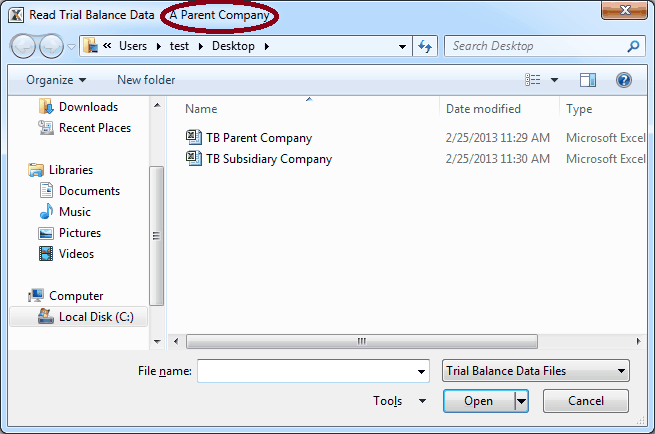
Select the type of file (bottom right). The Consolidation list can combine files of various types (Excel files, QuickBooks Desktop Company files, QuickBooks Online Company files)
Select the folder where the file is stored.
Select the file containing the desired trial balance data, and click Open.
If the file contains more than one worksheet, you will be asked to select the one containing the Trial Balance data.
Delete - Delete the currently selected enterprise. The enterprise will be deleted only if it was not part of the consolidation of a previous financial period.
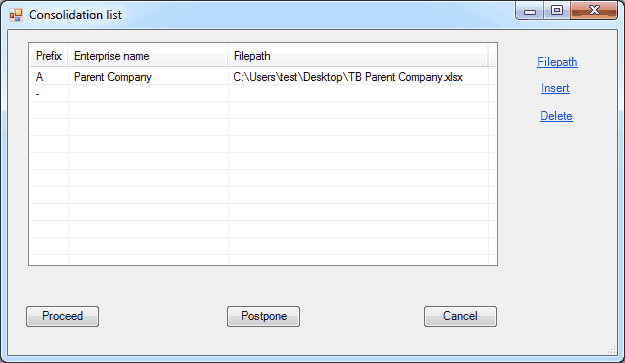
Once the list is completed, click Proceed:
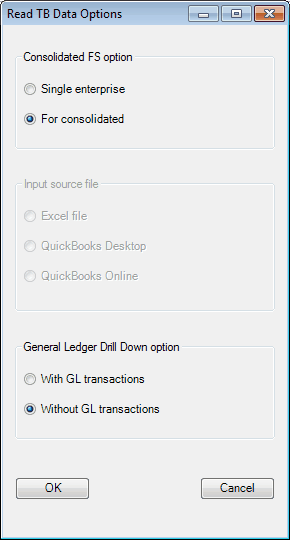
ExcelFSM start with the first enterprise of the list and shows the Read Trial Balance Data dialog to specify additional information about the trial balance file.


Excel file (*.xls, *.xlsx) QuickBooks Desktop file (*.qbw) or a QuickBooks Online file (*.txt)
Specify the trial balance information for this enterprise and click OK.
ExcelFSM reads the trial balance of the enterprise as usual.
ExcelFSM repeats the above process, one enterprise after the other.
Use these specifications for the next enterprises - Check if you want to use the same specifications for the next enterprises. If this checkbox is checked, the Read Trial Balance Data dialog above will not be displayed for the remaining enterprises of the Consolidation list, and ExcelFSM will use the same specifications for these enterprises.
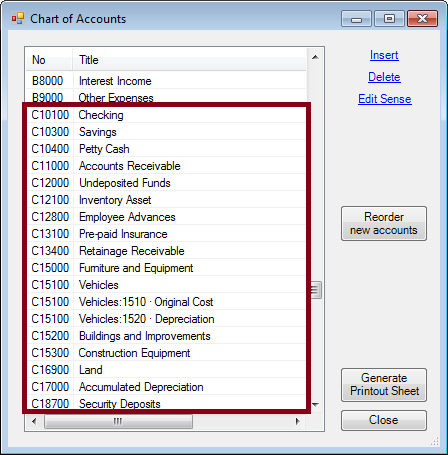
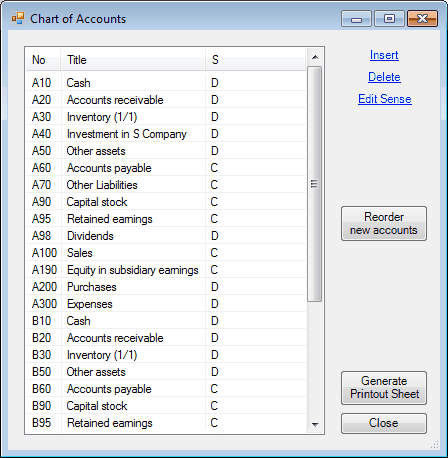
At the end of the reading process, a ‘ReadTBData printout’ worksheet is generated and inserted into the workbook. The worksheet is named sequentially by a letter, starting with letter ‘A’ for the parent company.
This letter ('A') is also added to the account numbers in the Chart of Accounts.
Note that the FSM workbook will be named with the word ‘Consolidated’.
Following financial periods
Updating a Consolidated FSM workbook with trial balances for a new financial period is similar to the above. The Consolidation list is remembered from the previous financial period. All you must do is to provide the file path of each enterprise.
Amended trial balances
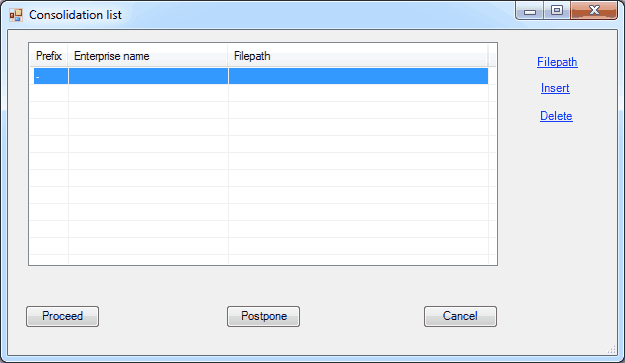
ExcelFSM allows the reading of selected amended trial balances to update a Consolidated FSM workbook with amended trial balances. Simply provide the filepath for these selected amended trial balances and leave the other filepaths blank. ExcelFSM will read only the trial balances with a filepath specified in the Consolidation list.
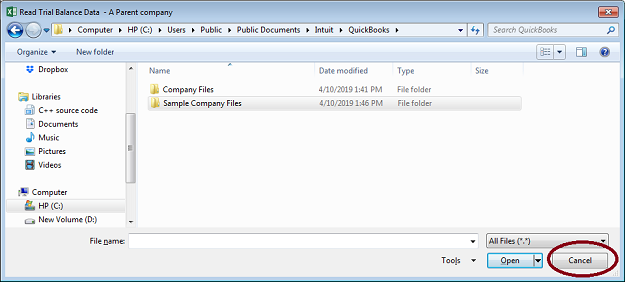
The filepaths for excel files are presented blank every time, but filepaths for QuickBooks are kept from the previous process. To set these filepaths to blank, select a line and click 'Filepath', or double-click the third column, to open the standard Windows dialog, and simply click 'Cancel' in the Windows dialog.
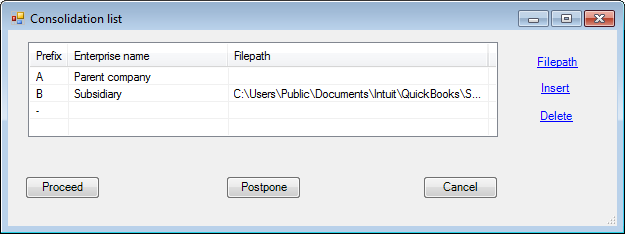
In the above sample, ExcelFSM will only Read Trial Balance Data for the enterprise B.
Adding a new enterprise to the Consolidation list
Clicking 'Insert' from the Consolidation list of an existing Consolidated FSM workbook, the new enterprise is inserted at the bottom of the list, and the new accounts will be shown at the bottom of the Chart of Accounts.