Create Leadsheets:
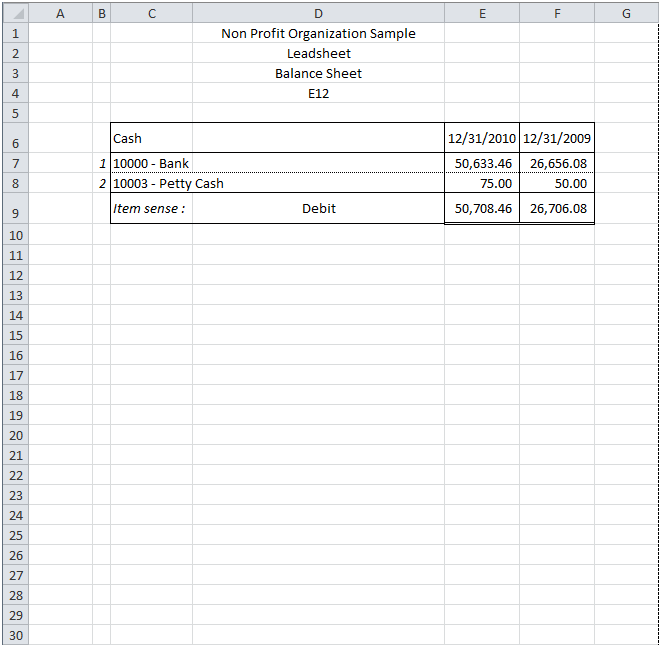
For each Item in a financial report, the Leadsheet shows the financial report sheet name (cell D3), the cell address of the Item balance (D4), the Item description (C6), the grouped accounts and respective balances, adjusted or unadjusted (according to the Adjusted Balances button status), Rounded or not (according to the Rounded button status), the sequence order of each grouped account (column B), and, if selected, a comparative period (column F).
Balances appear in parentheses if they have a different accounting sense than that of the Item.
Hint: Double-click on an account balance in the Leadsheet to view the Account Balance Detail. With the General Ledger Drill Down feature, double-click on an account balance in the Account Balance Detail to view the account balance detail, from which, double-clicking on a transaction displays the Transaction Detail.
The working paper is placed into a new worksheet, named
LS-<{Identifier}>-Worksheet Name of the active financial report (max 10 characters)>-<Item Description> (limited to 30 characters)
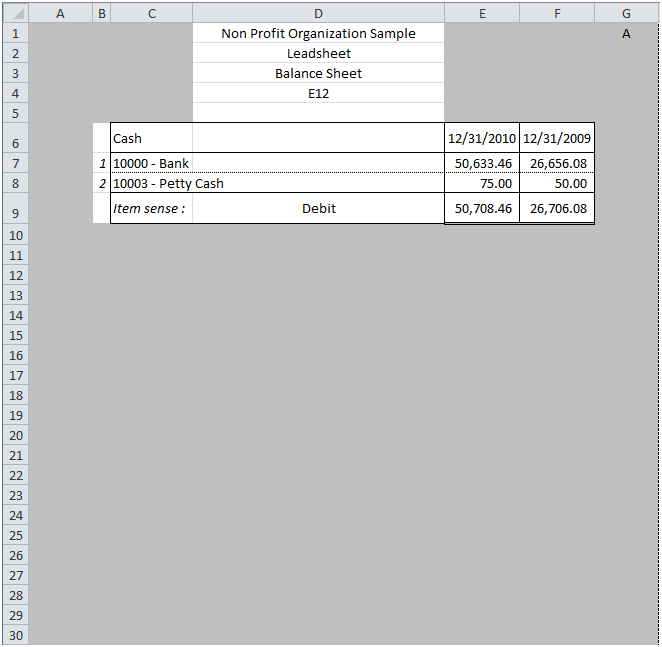
Here is the financial report that was active when the Leadsheets button was clicked:
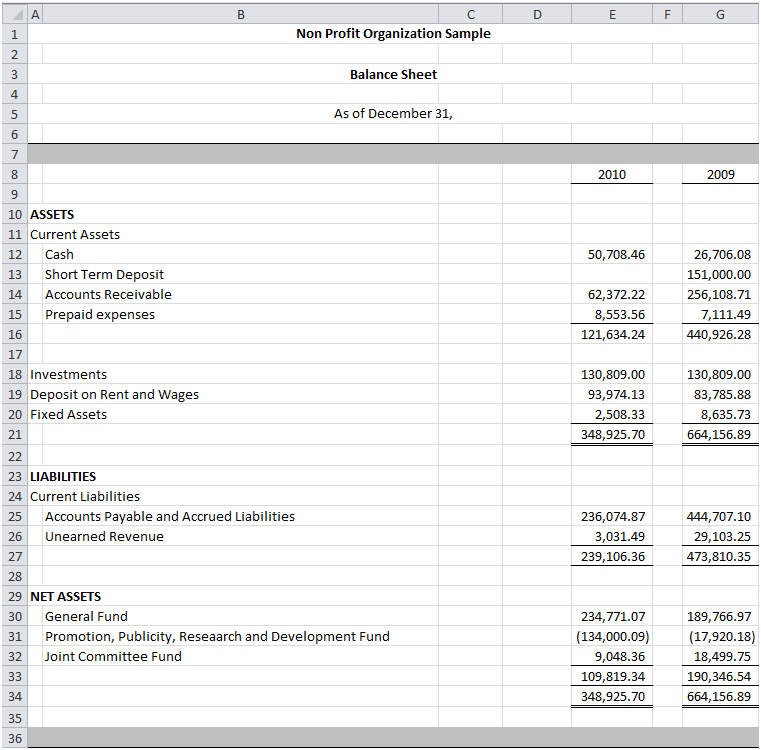
In this example, the Balance Sheet has a “Cash” Item Balance in cell E12.
After clicking the Leadsheets button, you are prompted to specify the Items in the active worksheet for which you wish to create a Leadsheet:
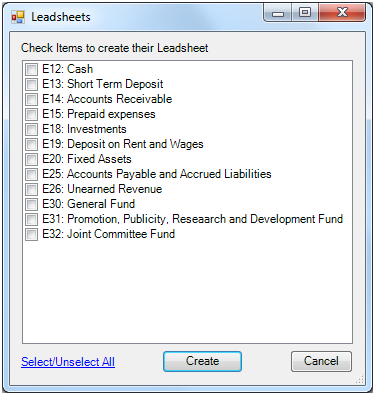
Check the desired items (or click Select all), then click the Create button.
NOTE: Leadsheets already created are removed from the list.
After clicking the Create button, you are prompted to select a comparative period (period or periods range) for the Leadsheets:
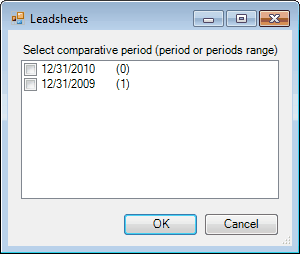
Check the period or periods range, then click OK.
Customization and User Notes
Tickmarks, references, comments, initials, etc. can be written in the Leadsheet working paper, around the data managed by ExcelFSM (in the area represented by shadowed cells and rows):
Rows can be inserted between the header and the item grouping detail, so between rows 4 and 6 in the sample above, but not within the header nor within the item grouping detail.
Columns can be inserted except between the sequence number and the account description, so except between columns B and C in the sample above.
Comparative columns can be added by clicking the Comparative button, or with copy & paste.
Period or periods range can be selected by clicking the Select Period button.

Always up to date
Leadsheets are always up to date. Changes made through the Read Trial Balance Data process, in Adjusting Entries, in Item groupings, in the Adjusted balance button status, in Category selection, and in the Rounded button status are automatically reflected, to always show the balances of the related financial report.
Auto update
For some working papers, the updating process takes few seconds, and for that reason, the automatic updated is not the default for the working papers. To make it the default, the checkbox '_WP auto update' in the 'Sheets Manager' must be checked.
If not checked, when changes are made to a financial report, the tag of the related Working Papers are colored in red to indicate that the working paper is not up to date. Clicking the update button in the 'Sheets Manager' will update the working papers with tag colored in red.
Note: User Notes remain preserved.
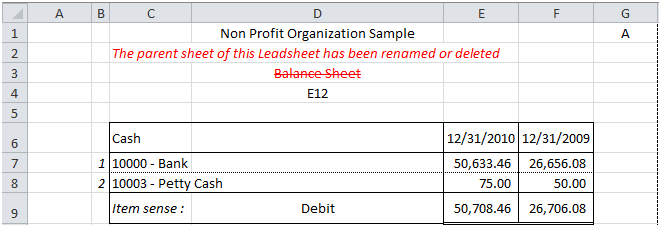
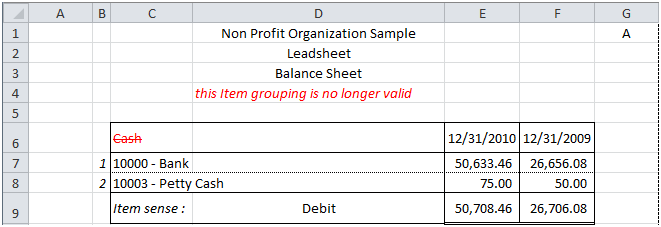
Deleted Item Balance groupings
If an Item Balance grouping has been deleted from a financial report, it will be indicated in the Leadsheets as follows:
Deleted Financial Statements
If a financial report is deleted from the workbook, it will be indicated in the Leadsheets as follows: